
The robotic mower reliably follows its routes, the lawn gets shorter—and yet suddenly a yellowish-brown film appears over the area. If you then look at individual blades more closely, you often find frayed tips instead of clean cutting edges. This is exactly one of the most common points of frustration that robotic mower owners report in forums: The device seems to be working normally, but the cut pattern becomes visibly worse.
That’s why, in the workshop, we never look at only the app message or the age of the blades. Three things are decisive: the individual grass blade, the robot’s performance on the area, and the condition of the blades from below. With this checklist, you can tell whether new blades are due—and when another cause is more likely.
1. Frayed or crushed blade tips instead of a clean cut
The clearest sign isn’t on the robot, but right in the lawn. Pull a few freshly mowed blades out at two or three spots and examine the tips in good light. A sharp blade cuts the blade cleanly and clearly. A dull blade tears, crushes, or pulls the blade along for a bit before it’s cut off.
Many users describe these tips as ragged, curled, or rolled up—similar to gift ribbon that you pull over a scissor edge. This happens because the cutting edge no longer goes cleanly through the plant tissue. Instead of a smooth cut, you get an irregular, fibrous edge.
The quick blade test
- Clean: a straight, sharply appearing cutting edge without fibers.
- Suspicious: individual fine cracks, slightly frayed ends.
- Blade replacement likely: crushed, split, rolled up, or clearly cracked tips on many blades.
Important: A single damaged blade is not yet a verdict. Check multiple spots, especially where the robot last drove. If the pattern repeats across the entire area, this clearly indicates deteriorating cutting performance.
2. Why does the lawn look yellowish or silvery-gray?
Yellowish, brown, or silvery-gray tips are the warning sign that is noticed visually the fastest. In forums, people often complain about a “brown haze”: the grass isn’t completely brown, but from above it looks dull, dry, and uneven. The cause can be dull blades, because the injured, split blade ends dry out more strongly and discolor.
In our tests with fresh blades and visibly worn blades, the difference becomes clear especially upon closer inspection: freshly cut areas look more evenly green. After an untidy cut, the damaged tips reflect the light differently—this can make the lawn look gray-silvery before it actually turns brown.
Many users only switch blades once this discoloration is visible. This works as a practical rule of thumb, but it’s not ideal: by then, the lawn has already been unnecessarily stressed over several mowing cycles. It’s better to check the cutting edge early and not wait for the color change.
Key takeaway: Brown tips are a strong warning sign—but only the combination of discoloration and frayed blade ends makes dull blades truly likely.
3. The robot mows longer or leaves individual areas uncut
If the mowing robot otherwise manages its area reliably, but lately has been noticeably out longer or leaves small “islands” behind unsatisfactorily, it’s worth taking a look underneath the mowing deck. Many users report exactly this pattern: first they ignore the maintenance reminder, later individual areas are visibly cut less well, or the grass looks more laid over there than actually trimmed.
Dull blades cut especially poorly in dense, strong, or somewhat taller grass. The robot then has to drive over the same spot more often to leave an acceptable result. This can extend the planned mowing time. A device that regularly returns early to the charging station and then has to go back to the same area again should also be checked for the blades.
Properly classify the third sign
| Observation | Does it indicate dull blades? | What else to check? |
|---|---|---|
| Individual clumps of grass remain standing | Yes, often | Cutting disc, cutting height, wet or too-long grass |
| The robot needs significantly longer | Possible | Mowing schedule, area size, driving routes, battery status |
| Lawn looks patchy and uneven | Yes, especially with frayed blades | Check the blade plate for grass residue and free rotation |
| Only one zone is affected | Not necessarily | Uneven ground, shadows, grass density, obstacles |
If you want to check not only individual replacement blades, but also the matching disc for your device, you’ll find helpful guidance by mowing robot model in the category matching cutting discs and replacement blades. This is especially useful when the problem can’t be explained by a visual inspection of the small blades alone.
4. Shorter battery life, rougher noise, or vibrations
A lawn mower robot with dull blades may require more energy because the blades can no longer separate the stems with a clean cut. If the battery runtime suddenly becomes shorter on the same area, this can therefore be a accompanying sign. However, on its own it proves nothing: battery aging, high temperatures, dense spring growth, slopes, or many turning maneuvers also affect runtime.
More practical is the sound. Some owners describe a rougher, louder “tearing noise” when the blades wear down. Together with frayed stem tips and visible notches on the blades, this is a plausible indication. If, on the other hand, you hear grinding, milling, rhythmic clicking, or feel strong vibrations, you should not simply assume dull blades.
A grinding noise can also be caused by dried-on grass residue, a foreign object wrapped around the axle, a damaged cutting disc, or a mechanical problem. Switch off the robot, secure it against starting, and check whether the mowing disc can move freely. If the disc is blocked, if there are error messages, or if the vibration continues, you should not simply put the device back on the lawn.
Remember: Rough cutting plus poor cutting results indicates blade wear. Grinding, milling, or strong vibrations, on the other hand, are a reason for a more thorough inspection of the mowing deck.
5. Recognize notches, rounded edges, and oval blade holes from underneath
The visual inspection from below provides the clearest confirmation. To do this, fully switch off the robot, disconnect the battery if necessary according to the manufacturer’s instructions, and put on protective gloves. Turn the device only in the way specified in the operating manual. Then inspect each blade individually—not just one—because a set rarely wears down completely evenly.

New robotic mower blades look rectangular, uniform, and clearly sharp-edged. Heavily used blades often have small notches from contact with small stones, twigs, or edges. As wear increases, the corners become rounder; some blades appear almost triangular. Rust, stuck-on dirt, or dark deposits are also a reason to check, but they are not automatic proof of dull cutting edges yet.
The six visible inspection points on the blade
- The cutting edge is no longer straight, but dull or rounded.
- There are nicks, notches, or bent areas.
- The blade can no longer move freely because grass clippings are sitting underneath.
- The mounting hole has become oval instead of round.
- A clear wear track is visible under the screw head.
- If a blade or screw is missing—then do not let the robot mow any further.
With CUT GUARD cutting discs, we pay special attention in the workshop to mounting and clearance. A sharp blade doesn’t help if it’s stuck due to deposits or if the screw has already worn out. For a complete, even replacement, replacement blade sets with matching screws are more practical than swapping individual blades that have been randomly damaged to a great extent.
6. Brown tips despite new blades: What else could be the cause?
New blades installed, but the lawn still looks yellowish after just a few days? Then the cause may not be the blade—or not only the blade. This exact mix-up comes up frequently in user reports. The most common mistake: too much blade height is removed in a single pass.
If the grass has grown tall after a vacation, rain, or strong growth, the cutting height should be reduced gradually. Starting very low injures the lawn regardless of blade sharpness. Heat, dry stress, and an unfavorably low cutting height also lead to brown tips. In dense, damp grass, clippings can also collect under the disc and interfere with the clean running of the blades.
- Too much back-cutting: Set the cutting height higher at first and shorten it in several stages.
- Heat and drought: Do not mow extremely short; the lawn needs more blade mass for protection.
- High or wet grass: Extend the mowing window and, if necessary, cut the area once manually beforehand.
- Clogged mowing deck: Remove grass clippings, soil, and wrapping material carefully.
- Wrong mowing schedule: Regular, moderate trimming is better than infrequent, hard cutting.
A simple practical test helps: Clean the deck, mount a complete set of new blades, and observe two to three mowing passes. If the cut pattern clearly improves, the old blades were very likely the main cause. If it remains just as poor, check the cutting height, lawn conditions, and the mechanics of the disc.
How often do you need to change robotic lawnmower blades?
There is no reliable replacement interval that fits every garden. In forums, experiences range from just a few weeks in dense, tall grass with many obstacles to several months on well-maintained, clean areas. Stones, twigs, sand, molehills, and frequent mowing along edges can significantly shorten a blade’s service life.
Our workshop rule is therefore: Don’t switch blindly by the calendar, but check regularly. Look at the cut pattern briefly once a week and inspect the blades and disc at least once a month—more often if growth is strong or the area is stony. A warning in an app is a useful reminder, but it does not replace visual inspection.
The double-cut trick – only if your blade type is designed for it
Some blades have multiple usable cutting edges. With such models, turning the blade can bring the remaining sharp edge to the outside and extend the service life. However, this only applies if the design, screws, and the manufacturer’s instructions explicitly allow this step. Not every blade may be turned, and an unevenly assembled set worsens balance.
Instead of sharpening dull blades, a complete set of new blades is usually the cleaner solution. During sharpening, the material, cutting geometry, and possibly the weight change. Especially with small, freely moving robotic blades, it’s more important for all blades to be in an even condition than to rely on an improvised reworked edge.
Complete the blade change correctly: check the screws, replace the mowing disc only if damaged
Always replace all blades on a mowing disc together. This keeps weight and cutting pattern as even as possible. While doing so, check every screw: If the head is damaged, the shank shows signs of wear, or the screw can only be loosened with difficulty, it should be replaced as well. A missing blade or a loose mounting point can cause imbalance, noise, and subsequent damage.
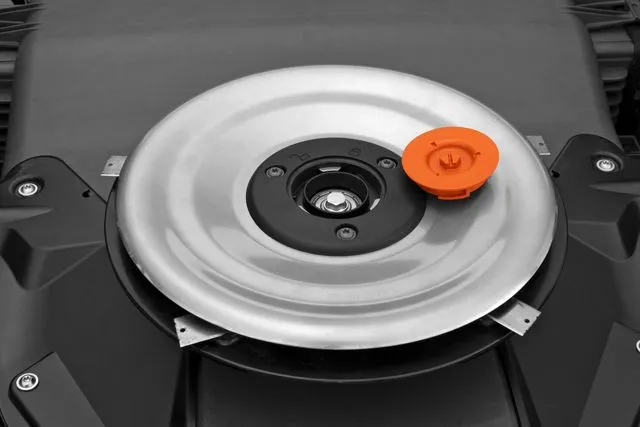
The mowing disc itself is not a classic wear part with a cutting edge. Normally, it does not need to be replaced with every blade change. You should replace it if it has cracks, warping, damaged mounting points, insufficient clearance, or if it noticeably vibrates after cleaning and correct installation.
For owners of a Mammotion model who want to check not only the blades, but the entire setup, a ninefold-equipped LUBA cutting disc solution can be a sensible choice. It makes switching to a uniform, controllable set easier, instead of continuing to use individual blades with different degrees of wear.
With Navimow H500E, H800E, or H1500E, a complete check is especially worthwhile if the robot runs unevenly despite new blades: A suitable mowing disc for the Navimow H series provides a clear basis when the existing disc is visibly damaged or no longer reliable.
Even with Husqvarna Automower, the disc should only be replaced in case of real damage. However, if the blade mounts, fasteners, or the disc itself have been affected after contact with stones, a robust cutting disc for many Automower models is a targeted solution rather than continuing to mow with an conspicuous component.
Frequently asked questions
Do I need to replace the blades immediately after the app warning?
No, the warning is primarily a reminder—however, you should check the blades promptly. What matters are the cutting pattern, visible notches, and secure fastening. If the lawn already has frayed tips or if certain areas remain uncut, you shouldn’t wait until the next reminder.
Are brown lawn tips always a sign of dull blades?
No, brown tips can also be caused by heat, drought, cutting too low, or an overly aggressive back cut. Dull blades are especially likely when the blades also look torn, crushed, or rolled up. That’s why you should always check the lawn and the blades together.
Does the mowing disc need to be replaced with every blade change?
No, the mowing disc usually stays mounted and is only replaced if it’s damaged or if there are functional problems. Cracks, bent areas, worn mounting points, or persistent vibrations after cleaning and a blade change are clear reasons for a closer inspection.
Is a grinding noise a sign of dull blades?
No, a grinding or scraping noise isn’t typical enough to determine dull blades as the cause. First check grass clippings, wrapping material, foreign objects, the cutting disc, and its bearings. In case of blockage errors or strong vibrations, the robot should not continue running.
Should I replace only the blades or also the screws?
Check the screws with every blade change and replace damaged or worn examples right away. An oval blade hole, a wear track on the screw shank, or a worn screw head are not minor issues—they are safety-relevant signs of wear.
Conclusion: Check the cut pattern first, then replace consistently
Dull robotic lawnmower blades rarely announce themselves with just an app notification. The six clear signs are frayed or crushed blade tips, yellowish-brown or silvery-gray areas, poorly mowed sections, longer operating times or shorter battery life, rougher sounds or vibrations, and visible damage to blades or fasteners.
The best process is simple: look at the lawn, check the blades, switch the device off safely, and inspect the cutting disc and screws. If you notice wear, replace the entire set. It takes little time, protects the cutting pattern, and prevents a dull blade from turning into an unnecessary problem on the blade plate.
Comments