The lawn mower runs regularly; the lawn was lush green beforehand—and suddenly, after mowing, yellowish or silvery-gray tips appear. Sometimes the discoloration even runs across the area like lines. This is frustrating, because the robot is supposed to care for the lawn evenly and not make it look worse. Many users report exactly this problem: they suspect the blades first, although depending on the pattern, overlong clippings, wet tracks, or a damaged lawn can also be behind it.
From a workshop perspective, however, the following applies: if the individual blade tips are dry, frayed, and appear brownish-yellow, dull, damaged, or stiff blades are a very likely candidate. A sharp blade cuts the blade cleanly. A dull blade tears, crushes, or frays it—and this injured tip visibly dries out.
Lawn turns yellow after a robotic mower: Are the blades really to blame?
No, not every yellow spot automatically means a blade defect. But yellowish-brown leaf tips directly after mowing are a typical warning sign. In our tests with CUT GUARD cutting discs, we repeatedly see that the cut pattern reveals much more than just the blades’ appearance. A blade may still look usable from the outside, but at the cutting edge it may have already worn down so far that grass blades are no longer cut cleanly.

Many users also report yellow, straight lines where longer clippings are left behind. In this case, the robot is not necessarily dull. Often, the grass was simply already too long by the next mowing session. Small, freely swinging robotic blades generate significantly less airflow than large mowing systems. Long blades are then cut, but not always finely enough to be chopped up or distributed evenly.
That’s why the most important question is not only: “Are the blades dull?” But rather: What do the blades and the yellow areas look like exactly? If you interpret the pattern correctly, you can avoid unnecessary blade changes—or, conversely, prevent dull blades from tearing up the lawn for weeks.
The three typical pictures: yellow cutting tips, yellow lines, or yellow wheel tracks?
Yellow isn’t always the same. Before you reach for the first screwdriver, check whether the discoloration is on individual leaf tips, appears as a loose line on the lawn, or matches the robot’s driving paths exactly.
| Symptom | Likely cause | First sensible step |
|---|---|---|
| Yellow, silvery, or frayed blade tips | Dull, bent, or blocked blades | Check blades, screws, and clearance |
| Yellow lines with visible long clippings | Mowed too infrequently, grass too long | Shorten the mowing interval and adjust the height gradually |
| Yellow stripes exactly in wheel track width | Tracks, moisture, compaction, or stressed lawn | Check mowing time and driving pattern |
| Yellow patches with orange-red dust | Rust or other lawn disease | Check lawn health; don’t just replace blades |
In forums, people often complain that the robot leaves behind “yellow lanes.” On closer inspection, longer clippings that have already died off are often found there. This is especially common in areas of the garden that grow quickly, are rich in nutrients, or are more humid. The problem then occurs only in sections, even though the robot uses the same blades everywhere.
Practical rule of thumb: If only the blade ends are frayed, start with the blades. If yellow clippings are laid on the lawn in lanes, start with the mowing interval.
How can I tell if my robotic mower blades are dull?
The most reliable test is to look at a freshly mown blade of grass. Use scissors to cut a few blades from a noticeable area, or lift them between your thumb and forefinger. With a magnifying glass, a smartphone macro photo, or simply in good light, the cut surface can usually be assessed clearly.

This is what a clean cut looks like
- The edge of the blade is smooth and relatively straight.
- The tip stays green after mowing.
- From a distance, the lawn looks even rather than gray or dull.
- No noticeable light tips appear directly after the mowing process.
This is what a torn or crushed cut looks like
- The tip is fibrous, frayed, or irregularly jagged.
- The cut edge looks whitish, gray, yellow, or brown.
- One to two days after mowing, the lawn looks “burnt.”
- Some blades are stuck, don’t rotate freely, or are visibly bent.
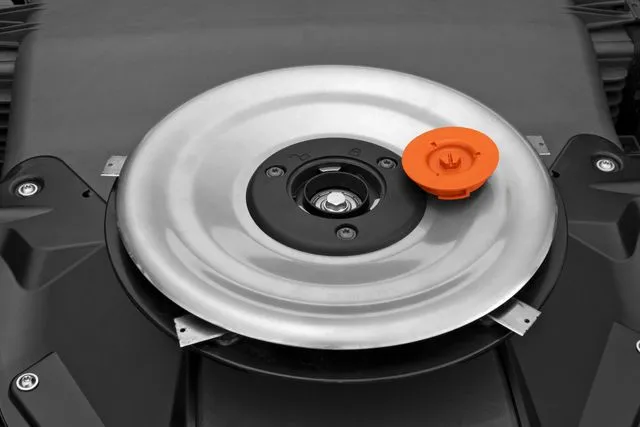
Always check the entire blade plate. A missing blade, a rusted screw, or grass stuck to a pivot point is enough to worsen the cutting pattern. If, during inspection, you find that blades, screws, or plates are worn, you can find suitable blade solutions for many mowing robot models instead of replacing just a single blade as an emergency fix.
Important for safety: switch off the robot, disable the main switch, or disconnect the battery according to the manufacturer’s instructions, and wear protective gloves. Even small robot blades are sharp enough to cause injuries.
How often do mowing robot blades need to be replaced?
As a practical workshop rule, during the growth season it’s worth doing a visual inspection every two to four weeks; if the tips are clearly frayed, the blades should be replaced immediately. Under normal conditions, many households get through the intensive season with a complete replacement about every six to eight weeks. However, sandy soil, molehills, small stones, twigs, or very long daily operating times can significantly shorten blade life.
A fixed calendar entry does not replace the inspection. Some users report a visibly worse cutting pattern after about two months, while others can run with the same blades for longer without any problems. The deciding factors are the area, runtime, ground conditions, and obstacles—not just the age of the blade.
Always replace blades as a set. Blades that are worn differently can make the run on the disc more unsteady and often do not deliver an even result. If you want to replace the cutting edges and screws uniformly—not just add individual replacement parts—then complete replacement blade sets for replacement are the cleaner solution.
Practical rule of thumb: Don’t wait until a blade is missing before replacing it. Yellow, frayed tips are already a sufficient reason to renew the entire blade set.
Mowed too rarely? Why long clippings turn yellow
Many users report that yellow lines disappeared after the robot was run every one to two days instead of only every three days during strong growth phases. That makes sense: the shorter the cut blades are, the better the robot can mulch them and distribute them among the standing blades of grass.
If the lawn grows quickly after rain, heat, and fertilization, a three-day interval is often too long. The robot then cuts larger amounts at once. Longer clippings remain visible lying on top, dry out with a yellowish tint, and collect especially where the lawn is denser or taller.
How to correct the mowing program
- Shorten the interval for seven to ten days to daily or every-two-days mowing.
- Do not reduce the cutting height abruptly, but only in steps, at most.
- After two to three mowing sessions, check whether visible clippings lines are still forming.
- If a lot of material is left behind, additionally check the blades for sharpness and clearance.
Mowing too low increases stress. If too much leaf mass is removed, the lawn dries out faster in warm weather and also appears yellowish. Therefore, after a longer growth phase, give the lawn time: first mow more frequently, then reduce the height gradually as needed.
Avoid yellow tracks: dew, frost, and repeated passes
Yellow stripes can also occur where the robot keeps driving again and again—especially along the boundary, in narrow spots, or on systematic tracks. In forums, users report yellowish wheel marks after repeated early-morning mowings. The robot doesn’t necessarily have to be too heavy for this: moist, soft, or already stressed ground reacts more sensitively to repeated overrun.
That’s why you should check the mowing time. If the robot regularly runs at night or early in the morning, it frequently encounters dew, wet ground, or even frost in spring. This can crush grass blades, compact the surface of the soil, and encourage existing fungus problems or spread them across the area. In most cases, it’s better to use a time window in which the lawn has dried out.
For models with configurable patterns or fixed tracks, it’s also worth checking the setting. If the robot repeatedly follows the same route, any strain becomes more visibly noticeable. A varying driving pattern distributes the wear more effectively. Especially for LUBA models, where a modification of the cutting system is being considered, a suitable 9-blade cutting disc for LUBA should only be part of the solution—wet tracks are not solved by an additional set of blades.
If it’s not a blade problem: fungus, rust, dryness, and fertilizer
If the yellow spots are not predominantly located on freshly cut tips, you should shift your focus from the blade plate to the lawn. Orange to rust-colored dust on shoes, hands, or blades of grass is particularly noticeable. This is more consistent with lawn rust than with dull blades. A robotic mower can make these effects visible over a larger area through regular driving over it and mulching.
Other causes include dry stress, compacted soil, uneven watering, too little or incorrectly distributed fertilizer, as well as a cutting height set too low. Typical for these causes: the discoloration is not limited to the cut edges. Entire blades, small patches, or individual sunny areas look weak, even though the blades are cutting cleanly.
If you suspect fungus, don’t simply keep mowing in the damp stand. Clean the wheels and underside according to the manufacturer’s instructions, mow when the grass is dry, and if there is heavy or recurring infestation, identify the underlying cause of the lawn. New blades may improve the cut, but they don’t treat the disease.
Practical rule of thumb: Rusty dust, blotchy yellowing, or completely yellow blades indicate more of a lawn problem. Frayed tips indicate more of a blade problem.
Replacement blades and mowing disc upgrades: What matters in practice
More blades do not automatically mean a better lawn. Many users are satisfied with three standard blades, as long as they are sharp, move freely, and are mounted correctly. Others want a more stable solution with more blades when there is a high workload, recurring poor cutting results, or a worn original mowing disc.
What matters is the design: the disc must fit the model, run balanced, and provide enough clearance for the blades. DIY solutions or unbalanced modifications can put strain on the bearings, the motor mount, and the blade fastening. That’s why, in the workshop, we don’t aim for “more,” but for a safe, precisely manufactured, and correctly mounted mowing disc.
For the Segway Navimow H series, when the original system is worn, it can be worth taking a look at a precise 9-blade solution for Navimow H, provided that model compatibility and installation requirements are checked. The same principle applies for Husqvarna: anyone specifically looking for a more robust cutting system should choose a mowing disc that fits the Automower models, instead of mounting any disc with a seemingly similar hole pattern.
With inexpensive replacement blades, it’s not only the cutting edge that matters. In forums, people often report rusting screws, weak threads, or lost blades. Therefore, always use suitable, intact fastening parts and tighten screws according to the specified instructions. A good blade is useless if it can’t swing freely or comes loose.
Quick check: What to do if the lawn looks yellow right after mowing?
- Inspect the blade tips: Are they cut cleanly or frayed and fibrous?
- Check the clippings: Are there longer yellow remnants in straight tracks?
- Check the mowing disc: Are the blades dull, bent, clogged, missing, or difficult to move?
- Replace the complete set: If the cutting pattern is clearly poor, install new blades along with the matching screws.
- Shorten the mowing interval: If growth is strong, let it mow more often for one to two weeks.
- Adjust the mowing time: Don’t regularly mow on dew-wet, frozen, or very wet grass.
- Check lawn health: If you see rust dust, spots, or yellow blades, look for causes outside the blades.
Frequently asked questions
Are yellow stripes after mowing always a sign of dull blades?
No, yellow stripes are often traces of clippings or tire tracks and not automatically a blade problem. Dull blades are especially noticeable by frayed, yellowish, dried blade tips. If, on the other hand, longer blades are lined up on the surface, the mowing interval should be shortened first.
How can I tell if the robotic mower is tearing the grass instead of cutting it?
A torn cut shows up as irregular, fibrous, and gray-yellow blade tips. A clean cut is smooth and stays mostly green. After that, check the blades, screws, and the free movement of each individual cutting disc.
How often should I have it mowed during periods of heavy growth?
During periods of heavy growth, daily or every-two-days mowing is usually more sensible than spacing it out by three days. This way, only short clippings are produced, which the robot can mulch and distribute more effectively. After rain, heat, and fertilization, a short-term adjustment of the schedule is especially worthwhile.
Can mowing in dew cause yellow wheel tracks?
Yes, regular driving on dew-moist or soft lawns can promote visible wheel tracks and stressed blades. The strain becomes noticeable quickly, especially in tight spots and during edge runs. If possible, schedule mowing for a dry time of day.
Do six or nine blades always help against yellow tips?
No, additional blades only help if the mowing disc is properly fitted, balanced, and equipped with sharp blades. They do not solve the underlying problem against fungus, drought stress, long clippings, or wet wheel tracks. A clean, safely mounted standard mowing disc can also deliver a very good cutting pattern.
Conclusion: Read the cutting pattern first, then act
Yellowish or brownish tips after the robotic lawnmower are often a clear sign of dull or damaged blades. If you take a closer look at whether the blades are cleanly cut or frayed, you can usually find the cause quickly. A complete blade replacement is then not just cosmetic—it protects the lawn from further tearing of the blade tips.
Yellow lines and tracks, on the other hand, require a different solution: mow more often, avoid leaving long clippings, don’t drive on wet grass, and check the lawn’s health if you notice spots or rust-colored dust. The best robotic lawnmower cut doesn’t come from having as many blades as possible, but from sharp, properly matched, and safely mounted blades—combined with a mowing schedule that fits the lawn’s actual growth.
Comments