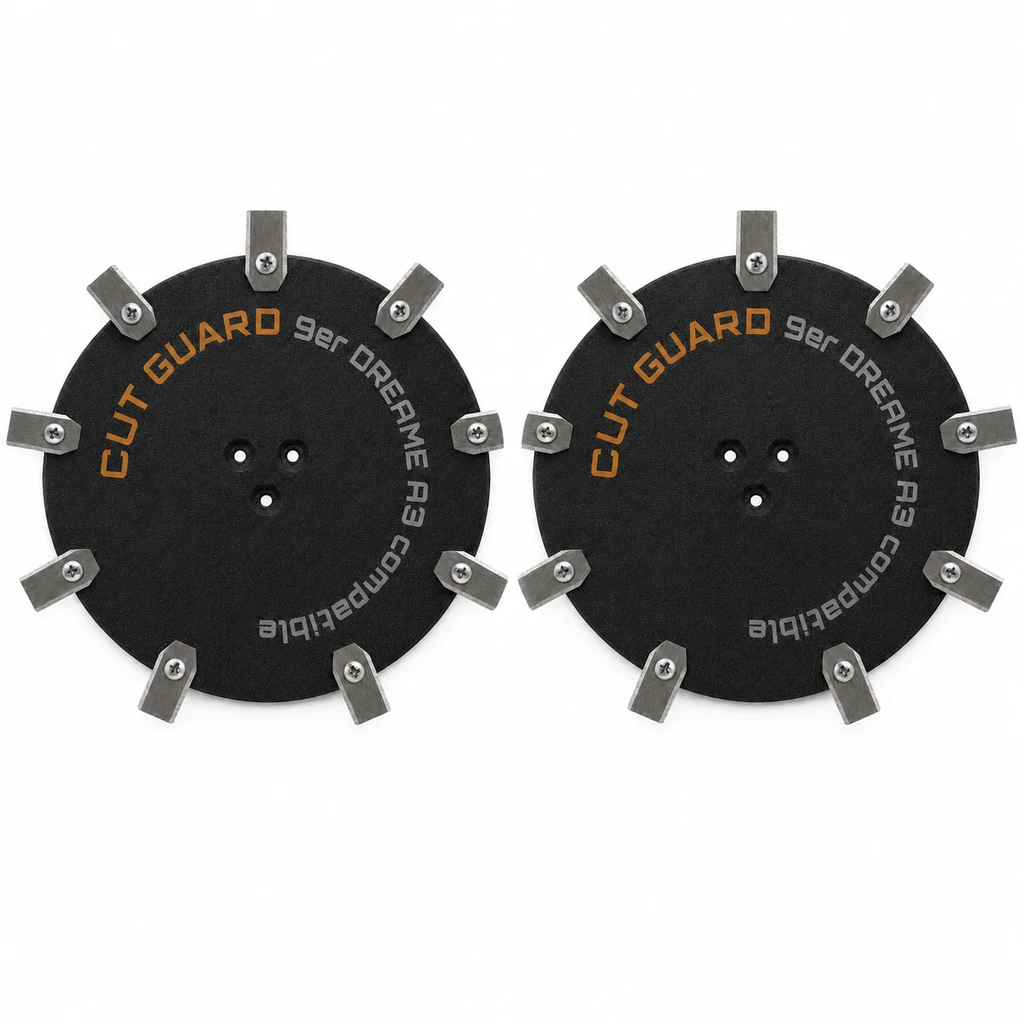
Der häufigste Grund, warum ein Dreame plötzlich schlechter mäht, ist nicht die Software und nicht der Akku. Es sind die Klingen. Sie kosten wenig, sind in einer Viertelstunde getauscht – und werden trotzdem regelmäßig zu spät gewechselt, weil man ihnen den Zustand aus zwei Metern Entfernung nicht ansieht.
Dreame hat die Modellreihe in wenigen Jahren stark verbreitert. A1 und A1 Pro als Einstieg, A2 als Mittelklasse, A3 AWD als Allradmodell für große und hängige Flächen. Die Mähwerkskonstruktion folgt bei allen demselben Prinzip: eine drehende Scheibe, darauf einzeln verschraubte Klingen, die frei pendeln.
Erst die Diagnose, dann die Bestellung
Bevor Sie Ersatzteile kaufen, klären Sie, was tatsächlich verschlissen ist. In der Praxis werden zwei völlig verschiedene Bauteile verwechselt.
| Klingen | Messerscheibe | |
|---|---|---|
| Funktion | schneiden das Gras | trägt die Klingen, überträgt die Drehung |
| Material | dünner Federstahl, wenige Zehntelmillimeter | massiver Kunststoff oder Metall |
| Standzeit | 1 bis 3 Monate (Herstellerangaben der Branche) | 1 bis 2 Jahre, oft deutlich länger |
| Wechselgrund | stumpf – planmäßiger Verschleiß | nur bei Beschädigung |
| Wechselrhythmus | mehrmals pro Saison, immer komplett | nach Bedarf, nicht nach Kalender |
Die Scheibe schneidet nichts. Sie dreht sich, und daran nutzt sie sich nicht ab. Wer sie routinemäßig mitbestellt, zahlt für ein Teil, das noch funktioniert. Ausgetauscht gehört sie, wenn eine dieser vier Bedingungen zutrifft:
- Ein Riss ist sichtbar – meist ausgehend von einer Schraubbohrung oder vom Rand.
- Die Scheibe liegt auf einer ebenen Fläche nicht mehr plan auf.
- Die Bohrungen sind oval ausgeschlagen und die Klingen wackeln stark.
- Nach einem harten Aufprall hat sich das Laufgeräusch verändert.
Die Dreame-Modelle im Überblick
| Modell | Antrieb | Klingen | Belastung des Mähwerks |
|---|---|---|---|
| A1 / A1 Pro | 2WD | meist 6 | normal, ebene Flächen |
| A2 | 2WD | meist 6 | normal bis erhöht bei größerer Fläche |
| A3 AWD (2000 / 3500 Pro / 5000) | Allrad | je nach Scheibenvariante | hoch – Hang, Sand, lange Laufzeiten |
Ein Hinweis zur Klingenzahl: Sie hängt an der montierten Scheibe, nicht am Robotermodell. Wer von sechs auf sieben oder neun Klingen umsteigen möchte, braucht die entsprechende Scheibe. Nachrüsten durch zusätzliche Schrauben funktioniert nicht, weil die Bohrungen fehlen.
Wechsel in zehn Schritten
- Stoppen und Sicherheitsschlüssel ziehen. App-Pause reicht nicht. Der Mähmotor muss stromlos sein.
- Handschuhe anziehen. Auch stumpfe Klingen haben scharfe Kanten. Die meisten Verletzungen passieren beim Abstützen, nicht beim Schrauben.
- Auf weiche Unterlage umdrehen. Karton oder eine alte Decke schützt Haube und Sensorfenster. Beim A3 AWD ist das Gerät schwer genug, dass sich eine zweite Person oder eine Werkbank auf Hüfthöhe lohnt.
- Reinigen, bevor Sie schrauben. Bürste und Kunststoffspatel. Zwischen Scheibe und Gehäuse sitzt getrocknetes Schnittgut, das den Lauf beeinflusst. Solange die Kruste dort klebt, können Sie das Laufverhalten nicht beurteilen.
- Alle alten Klingen abschrauben. Zählen Sie beim Abnehmen mit und legen Sie die Teile in ein Gefäß, nicht in den Rasen.
- Aufnahmen kontrollieren. Jede Bohrung: rund oder oval? Jede Schraube: Kopf intakt, Gewinde nicht überdreht?
- Neue Klingen setzen. Genau eine pro Position. Wenn Schrauben im Satz enthalten sind, diese verwenden.
- Handfest anziehen. Kein Werkzeug mit Hebelverlängerung, kein Akkuschrauber mit hohem Drehmoment.
- Beweglichkeit prüfen. Jede Klinge muss sich mit dem Finger um die Schraube drehen lassen. Klemmt sie, ist die Schraube zu fest.
- Testlauf auf Rasen. Nicht auf Pflaster – dort klappern die Klingen konstruktionsbedingt und Sie hören keine echte Unwucht.
Warum die Klingen lose bleiben müssen
Ein festgezogenes Messer kann nicht ausweichen. Trifft der Roboter auf einen Stein oder eine Wurzel, geht die gesamte Energie in Motorwelle und Getriebe. Die pendelnde Aufhängung ist eine Sollbruchstelle im positiven Sinn: Die Klinge klappt weg, das teure Bauteil bleibt heil.
Bei Kunststoffscheiben kommt ein zweites Argument dazu. Zu fest angezogene Schrauben reißen das Gewinde aus. Dann ist die Scheibe unbrauchbar, obwohl sie mechanisch völlig in Ordnung war.
Der A3 AWD verschleißt schneller – und warum das logisch ist
Beim Allradmodell liegen die Klingenintervalle systematisch am unteren Ende. Dafür gibt es drei mechanische Gründe, die nichts mit Qualität zu tun haben.
Hangbetrieb bringt die Klingen näher an den Boden. An Böschungen kippt das Gerät mit dem Gelände. An der Talseite arbeitet die Scheibe dichter über der Erde. Sand und Bodenpartikel in den unteren Halmzentimetern sind für dünnen Federstahl deutlich aggressiver als Gras.
Große Flächen bedeuten mehr Betriebsstunden. Der Verschleiß hängt an den geschnittenen Halmen, nicht am Datum. Ein A3 5000, der eine große Fläche bearbeitet, sammelt in einem Monat die Laufzeit, für die ein A1 auf 300 Quadratmetern ein Vierteljahr braucht.
Mehr Gewicht bedeutet mehr Wucht bei Kollisionen. Ein schweres Allradfahrzeug, das mit Steigungsdrehmoment gegen einen Randstein fährt, belastet die Scheibe stärker. Nach einem hörbaren Aufprall lohnt die Sichtprüfung, auch wenn der Roboter normal weiterfährt.
Woran Sie stumpfe Klingen erkennen
Die Klinge selbst gibt wenig her – die Schneide ist von Anfang an nicht messerscharf, und ein Millimeter Materialabtrag ist mit bloßem Auge kaum zu sehen. Der Rasen ist der bessere Indikator.
Die graue Fläche
Eine scharfe Klinge trennt den Halm glatt. Eine stumpfe reißt ihn ab. An der Bruchstelle verliert der Halm Feuchtigkeit, trocknet aus und verfärbt sich an der Spitze grau oder strohig. Über die gesamte Fläche ergibt das einen matten Schleier, der oft für Trockenstress oder Pilzbefall gehalten wird. Der Test ist einfach: Halm zwischen die Finger nehmen und die Schnittkante ansehen. Glatt und quer ist in Ordnung. Zerfasert bedeutet wechseln.
Die veränderte Laufzeit
Stumpfe Klingen brauchen mehr Kraft. Wenn der Roboter für dieselbe Fläche plötzlich einen Ladezyklus mehr benötigt und sich weder Graswuchs noch Wetter geändert haben, ist erhöhter Schnittwiderstand eine naheliegende Erklärung.
Der Zeitpunkt nach der Winterpause
Klingen, die über den Winter am Gerät bleiben, setzen Flugrost an – besonders, wenn der Roboter feucht eingelagert wurde. Rost frisst die Schneidkante an. Der Saisonstart ist ein sinnvoller Wechseltermin, unabhängig davon, wie viele Betriebsstunden die alten Klingen hatten.
Fehler, die man leicht vermeidet
Einzeln statt satzweise wechseln
Der verbreitetste Fehler. Eine neue Klinge neben fünf abgenutzten wiegt mehr. Bei mehreren tausend Umdrehungen pro Minute genügt dieser Unterschied für spürbare Unwucht. Das erzeugt ein Brummen, das viele für einen Motorschaden halten, und belastet die Lager des Mähmotors dauerhaft. Ein Klingensatz kostet wenig, ein Mähmotor nicht.
Zwei Klingen auf einer Schraube
Husqvarna listet diesen Fall in der eigenen Fehlersuche, weil er häufig vorkommt. Eine alte Klinge bleibt beim Abschrauben hängen, die neue kommt darüber. Von oben sehen zwei gestapelte Klingen aus wie eine. Das Ergebnis ist ein Summen, das Besitzer regelmäßig mit einem Bienenschwarm vergleichen. Zählen Sie nach dem Wechsel jede Position einzeln nach.
Klingen unterschiedlicher Herkunft mischen
Verschiedene Hersteller verwenden unterschiedliche Blechstärken. Auch wenn beide Sorten passen, ergibt die Mischung eine Unwucht. Ein Satz stammt von einem Hersteller und wird gemeinsam eingebaut.
Mit dem Hochdruckreiniger reinigen
Der Wasserstrahl drückt Feuchtigkeit an Wellendichtungen und Lagern vorbei. Der Schaden zeigt sich nicht sofort, sondern Wochen später als rau laufendes Lager. Bürste, Spatel und feuchtes Tuch genügen. Hartnäckige Reste weicht man ein, statt sie wegzuspritzen.
Die Scheibe vorsorglich mitwechseln
Kein Fehler im technischen Sinn, aber vermeidbare Ausgabe. Eine intakte Scheibe läuft weiter. Prüfen statt tauschen.
Häufige Fragen
Wie oft sollte ich beim Dreame A1 die Klingen wechseln?
Als Orientierung dienen die Herstellerangaben der Branche: ein bis drei Monate. Beim A1 auf kleiner, ebener Fläche eher am oberen Ende. Der Rasen ist der bessere Maßstab als der Kalender.
Und beim A3 AWD?
Eher am unteren Ende. Hang, Sand und lange Betriebszeiten kosten Schneidkante. Bei intensivem Einsatz auf großen Flächen kann ein Wechsel alle sechs bis acht Wochen sinnvoll sein.
Muss die Messerscheibe beim Klingenwechsel mit getauscht werden?
Nein. Sie ist der Träger, kein Schneidwerkzeug. Solange sie plan ist, keine Risse hat und die Bohrungen rund sind, bleibt sie am Gerät. Ein bis zwei Jahre sind eine vorsichtige Annahme.
Mein Dreame klappert beim Überfahren der Terrasse. Defekt?
Nein. Die Klingen hängen absichtlich lose und schlagen auf hartem Untergrund gegen die Scheibe. Kritisch wird es erst, wenn das Geräusch auch auf Rasen auftritt und die Haube spürbar vibriert.
Kann ich eine 9-Klingen-Scheibe auf einem A1 montieren?
Wenn die Aufnahme am Mähmotor passt, ja. Die Klingenzahl gehört zur Scheibe. Bedenken Sie den höheren Schnittwiderstand: mehr Klingen bedeuten feineres Schnittbild, aber auch mehr Stromverbrauch.
Der Roboter brummt nach dem Wechsel. Woran liegt das?
Fast immer an einem von drei Punkten: doppelt belegte Position, vergessene Position oder gemischter Satz. Alle drei sind in wenigen Minuten geprüft und behoben.
Lohnt es sich, die Klingen zu schleifen?
Nein. Beim Schleifen tragen Sie an jeder Klinge unterschiedlich viel Material ab. Sechs verschieden schwere Klingen erzeugen eine Unwucht, die Sie nicht sehen, die aber die Lager belastet. Der Preis eines Klingensatzes steht in keinem Verhältnis dazu.
Was mache ich mit den alten Klingen?
Nicht in den Restmüll und keinesfalls in den Rasen. Kleinteiliger Stahlschrott gehört zum Wertstoffhof. Bis dahin in einem verschlossenen Behälter aufbewahren, nicht offen in der Garage.
Kommentare